Posts

Showing posts from May, 2012

But what about Sculptris?

Image
Sorry for the slow blogging! I noticed that I said earlier, "I use Blender and Sculptris for my animations".  I have done tons of posts on the former, though hardly one on the latter.  This is mostly because I use Blender far more often and hardly use Sculptris at all, though it most certainly needs at least one post to itself. First of all, Sculptris has a different interface than Blender and Maya and all that, so to speak.  It views itself as "clay" that you can sculpt to your leisure.  You can do a lot of cool stuff with it, but, being an amateur, I did this simple model first: Well, it's about as easy as modeling goes, but as least it's something.  After that, I decided to do Blinky and the gang! I did the background in Blender, but Pac-man and the ghosts are from Sculptris. http://www.newtek.com/lightwave/ , another animation program, is the link of the post.  I don't actually think there's anything else to say here.  However,
Blender 101 1/2: the Physics Engine

Technical alert: this post explains how to do things in technical detail; you can skip this post if you're not interested in that kind of thing. Now, I am an amateur as you could see by some of my models, but nevertheless I also like teaching others about what little I know about Blender and other 3D software.  Today, the physics engine is my focus. There are seven different types of physics in Blender.  Force Field can make things like wind, tornadoes and, well, force fields.  Collision is necessary for projects that involve gravity--which would include clothing, floors, objects... basically anything in an advanced project.  Cloth makes your object turn into, well... cloth.  Fluids and Smoke also speak for themselves, and I have no idea what "Dynamic Paint" and "Soft Body" do. The physics engine is absolutely necessary for any advanced project; if you want snow to move around, that's a good time to use Force Field; Collision can help if yo

A Random Guy

Image
I believe that I’ve told you about Modifiers in a previous post.  You also have the opportunity to change the sky color, as I did for this poor fellow, who was also made using the “Gus” formula.  I have yet to figure out what all those triangles are on his head; my guess is that it has something to do with the lighting, his angled head and a shadow?  But anyway, today’s link of the post is http://usa.autodesk.com/maya , the website of Autodesk Maya, which I don’t have with me at the time (hint: it costs more than zero bucks) but I hear that a lot of other animators have it, so it deserves a mention here.

How to Photoshop: 3 Tools to Have Fun With First

Image
I realize very few of you have Blender, but Photoshop is much more common in users.  Therefore, I have decided to tell about what the most useful tools are (or rather, what I tend to use most often--different users are free to do their 'shops in different ways). 1) The most basic of all, the brush allows for simple fun stuff-making.  Good for lightsabers, "glowing" effects, stuff like that. 2) Liquify, which one can use on on particular spot  (e.g. elf ears and completely messing up frowns and smiles) or on the whole thing (which I used for the background of my me-vs-three-evil-clones star wars picture). 3) The magnetic lasso tool.  Some just use lasso and leave it at that, but also available are the polygon lasso tool (selects using lines) and magnetic (my favorite--selects by "sticking" to similar colors to help select one particular person, object, etc).  Anyway, it helps you to select stuff so you can move it from a family photo to an anci

I Forgot!

Image
All this time I haven't given you one high-definition picture of myself!  That's okay, since you probably read some of Mom's blog and already know, though for you few non-ZoomTimers I'm going to include a family picture.  Just so you know, I'm the dashingly handsome incredibly intelligent really bad at describing himself young man in the orange shirt and the fish pendant. The Valtapaz Family From left: The Prime Minister, (the white and blue dot is the new baby Mom's expecting!), Princess Klenda, Zorg, The Grand Emperor, Choclo, Leena, Oob, and myself, Mxyl, an abbreviation for Mxyzptlk.  I also go by That Really Cool Guy, Motym, The Hazard-Master, and several other unique names I'm not going to display here that involve my real name. Cheers, --Multiple names.

Computer Hacking

Here it is… The link of today’s post is the site of the bestseller game, Bejeweled 2 ! What, surprised?  It was the first “real” computer game we ever had! Ahem.  Well, to tell you why I put up nothing related to PC animation, Photoshop etc., I have been digging into this particular program and have brought up the backdrops as usable JPEG images!  For computer nuts who want to try this themselves (assuming you bought the full version), you can go to (for Windows) ‘My Computer’>’OS (C:)’ or ‘Local disk (C:)’, depending on the version>’Program Files (x86)’>’PopCap Games’>’Bejeweled 2 Deluxe’>’images’>’backdrops’.  If you have not yet bought the game but have a Windows 7 computer, it should have a trial version installed already.  If you’re interested in using images from this trial please ask me about it in the comments.  I used these background images for my Photoshops–it’s way safer than just browsing the internet for “alien backgrounds.” P.S. And

Gus

Image
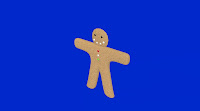
This is the first Blender object most people are going to create: “Gus the Gingerbread Man”.  I’ve mentioned him before; this model takes advantage of Blender’s “Extrude” function; if you’re interested you can see instructions for it here . What it wanted was this: What I made was this: It accomplished its goal (helping me learn more about Blender), but I believe it was not the best model of a gingerbread man.  What I believe I did wrong was I didn’t activate “Limit selection to visible” while modeling.  This caused all kinds of problems (All of the main body except the back is 2-D). Gus the Gingerbread Man, Scene one, Take: 2! Well, it’s better than last time… I still thought it could use a face lift.  It still looked far different from the example. Gus the Gingerbread Man, Scene one, Take: 2 1/2! I liked this one.  Just a few adjustments + better lighting + depth added = win.  And yes, I do know real gingerbread men are flat.  Not to mention I added armatures, p

Modifiers

Image
Sorry for not blogging for so long!  I was out camping at Mattaponi, where I don’t tend bring my desktop.  Not even my laptop.  Or even my iPod.  Or even my Take-Over-The-World-O-Matic .  But anyway, on to the blog.  This also contains technical stuff, by the way. Well, moving on to the fun stuff, using the same basic modeling technique as building “ Gus the Gingerbread Man ” (my picture of whom is below-left), I have made a pretty simple rendering, “A Guy” (below-right). However, I shortly realized a number of ways to change the background in little ways that can make the effect much more dramatic.  “Mist” actually cheats on its job by making farther away objects more transparent (much faster rendering than particle systems or that complicated stuff), and it makes for a very realistic effect.  Stars is even less complicated, scattering the background with little white dots.  Tip: be very careful about which effects you use and to what degree; too many cooks can make for