Posts

Announcement: Project ABYDOS

Image
    Finally, I've decided to announce that I'm working on another After Effects project!  This one, called Abydos, will be a much larger-scale project than either of my previous relatively long projects; going for a more engaging storyline, actual personalities and hopefully some world-building.  As well, since Clash of the Jedi, my skills have improved quite a bit: the enemies are planned to be entirely CG, and energy effects will be both flashier and more realistic-looking.  It'll incorporate ideas from Project Mirai (which is on hold for now) and will quite possibly take place in the same universe.  Only time will tell for sure; a short video's coming in September, though (likely the title sequence).  Ignore the lights. 

Catching Up (Finally)

Image
Wow.  Between summer camp, a beach house and a week-long drive, I really haven't been doing much.  But anyway, here's my final project from the college class that I finished over two months ago !  Again using Cycles render, I built the room based on pictures, measurements and a self-made floor map of my grandparent's kitchen!  While it's a bit grainy (due to the Cycles mode) and it isn't the most interesting thing to look at, the room itself is possibly the most realistic thing I've rendered, using different ways of modeling (e.g. a very extruded circle for the furnace) and image textures!  It was a fantastic class, and I've learned a lot from it! 

More Updates: Seven Quick Takes Edition

Image
Decided to do another of these, since I'm behind on my posting.  Here we are: 1. I've gotten a request to do a tutorial on Jason the Jumper (if anyone remembers him)!  I won't get too technical, but here are some major points: a) Start out with some basic shapes. In this case, I started out with a subdivided cube.  b) Extruding is essential (using the E button in Blender).  I've heard from one of my books that the Extrude function is possibly the most useful tool in the whole of Blender. c) Make a rough version. The Subdivide Modifier is a great help with smoothing out a final version. For anyone interested, here's a more step-by-step version of how I made it (excluding the face).  It assumes you already know the basics of Blender; if this wasn't what you were looking for, there's a much more detailed walkthrough on a gingerbread man on Blender's wiki (the original page doesn't exist before, but it's on the Internet Archive). Here'...

Got a Bit of Catching Up to Do...

Image
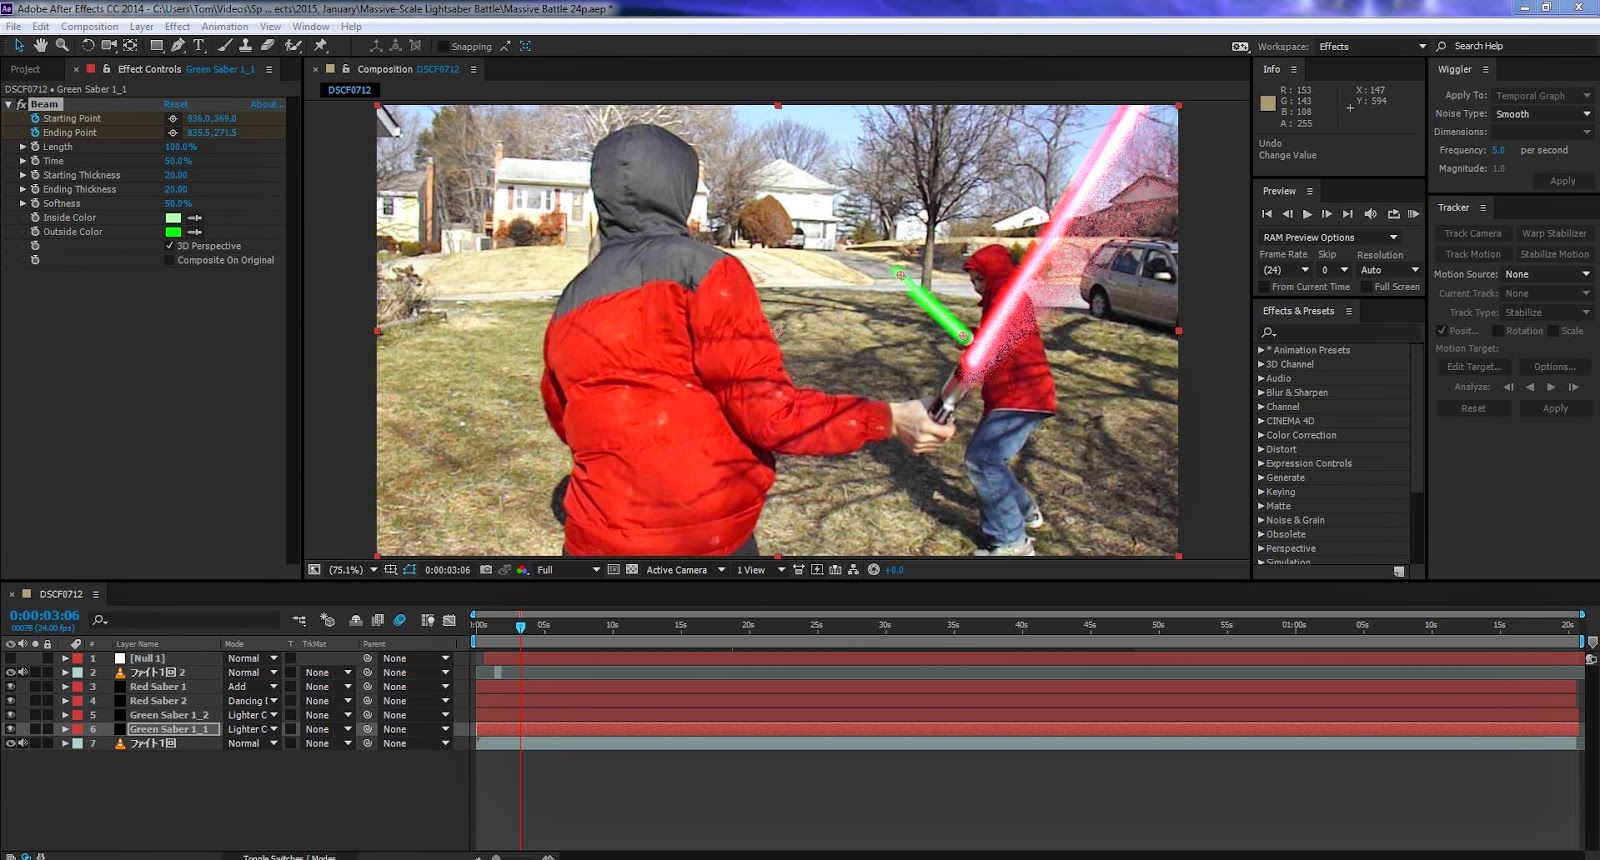
I've been in college for the last few months, so now I have a lot of catching up to do.  For now, though, I'll start with my relatively new video, Clash of the Jedi! Done with virtually no budget and an entire production team of two people, this was my most advanced project yet from After Effects.  I made the lightsabers by going to Effect --> Beam, although there are many more complicated ways to make them.  I got the fire effect from an excellent tutorial here , and the force jumps/knocking back were made by taking masks (in this case kind of like making selections) of the people and moving them.  I feel like this was my first "real" project, in the sense that it had music and multiple camera angles.  Hope to do more in the future!

At Last... After Effects!

Image
This is going to be a longer post than what I normally do, but don't worry, there's a movie.  Finally, after a while, I've learned much more on After Effects.  And now, I've finally decided to get started putting it on the blog... just as soon as my new college semester is starting.  Excuse me for a moment... *Whack!* Ahem.  After Effects, kind of like Photoshop for videos, is really pretty amazing.  Used on a huge amount of big-budget movies, I've done a lot with it, and I've recently learned that I've barely scratched the surface! Here's a screenshot of the basic area (while working on a yet uncompleted/test project):  There's a whole lot of stuff in this program, but in order to do anything with it, it's good to know about three really important things: 1. The Preview panel.  It's usually on the right side of the interface, but if it doesn't appear at all, you can bring it up by pressing Window-->Preview (if it's ch...

I Was Bored in Photoshop Class One Day, Sooo...

Image
I decided to see what  Bionicle would look like in live-action!  Does anyone else want to not see a movie of this?  Because I'm not making a movie of this.

College 2014: Final Assignment

Image
Finally! Now I have all my assignments on the blog before my next semester starts! My last assignment was an interesting one divided into five parts: Step 1: Make a Photoshop composition.  Here it is: Step 2: Take the previous project, take it a little bit further, and save it separately.  I decided to use the "painting" technique, only on different parts of different layers. Step 3:  Take product #2 and take it even further, saving it in a similar fashion.  Step 4: Go back to #1 and (how did you guess?) take it further, this time in a different direction.   Finally, step 5 (am I detecting a pattern here?): Take #4 and modify it somewhat, saving it as #5. I used masks and the clone tool + spot healing brush tool for most of the modification, although for #5 I used two tricks I learned from a seminar by Dr. Will Hammond (the Will Hammond who invented masking in Photoshop!): Copying parts of the background onto new layers and giving ...